Recently there has been quite a lot of talk about the open-source tool that is Keycloak. Primarily, because many companies rely on a ready-made solution such as SSO (Single-Sign-On). It allows them to save both time and money for implementing their own or buying a ready-made solution.
What is Keycloak?
Keycloak is an open-source authentication and authorization server. It can be connected to LDAP/AD or authenticate users using Google, Facebook, LinkedIn, Microsoft, etc. With the administration console, user permissions are easy to configure.
What does this mean in practice? With the help of this tool, we can easily secure our application by adding a login to it. Additionally, from its console, we can manage permissions and users. And even secure our API.
In today’s entry, I would like to describe the construction of Keycloak and its installation. In the following, I will describe how to integrate it with Angular and Spring Boot applications to take full advantage of its capabilities.
Installation
The official Keycloak documentation describes how to install it from the source. However, we will install it more simply.
First of all, we need Docker Compose installed. For Windows, it is already included, in Docker Desktop. In other cases, I refer to the official documentation.
Second, we create our dockercompose.yml:
version: '3'

        volumes:
        postgres_data:
        driver: local

        services:
        postgres:
        image: postgres
        volumes:
        - postgres_data:/var/lib/postgresql/data
        environment:
        POSTGRES_DB: keycloak
        POSTGRES_USER: keycloak
        POSTGRES_PASSWORD: password
        keycloak:
        image: jboss/keycloak:12.0.3
        environment:
        DB_VENDOR: POSTGRES
        DB_ADDR: postgres
        DB_DATABASE: keycloak
        DB_USER: keycloak
        DB_SCHEMA: public
        DB_PASSWORD: password
                KEYCLOAK_USER: admin
                KEYCLOAK_PASSWORD: admin
                ports:
                - 8080:8080
                depends_on:
                - postgres
Write it down, remembering where – you will need the path to it later 🙂 The most important elements of our file are:
The most important elements of our file are:
- KEYCLOAK_USER – which is the name of Keycloak’s administrative user;
- KEYCLOAK_PASSWORD – the password of this user;
- ports – on which port the service will run (8080).
I’ll write a separate post about the other elements and Docker Compose itself in the future 🙂 I’ll also write a separate post about it in the future.
Third, we run it:
| docker-compose -f dockerfile.yml up -d
if we are not in the location of our file in the console, you need to remember to provide a path to it.
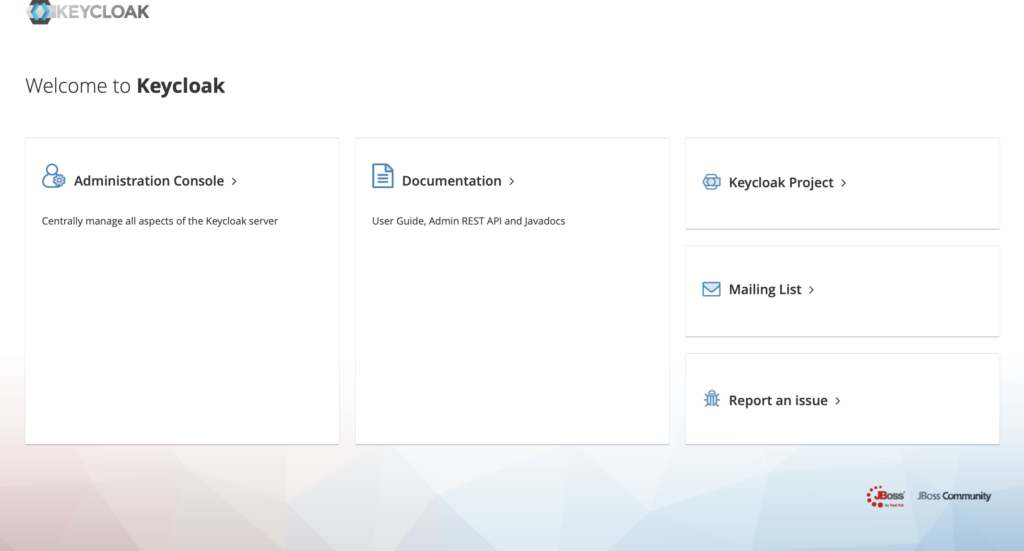
If all went well, after typing localhost:8080 in your browser you should see the Keycloak homepage:
Fourth, we run the command:
docker ps
Now we will see our two containers:

How is Keycloak built?
We have already installed the Keycloak – the question is: how is it built?
Its structure is shown in the picture below:
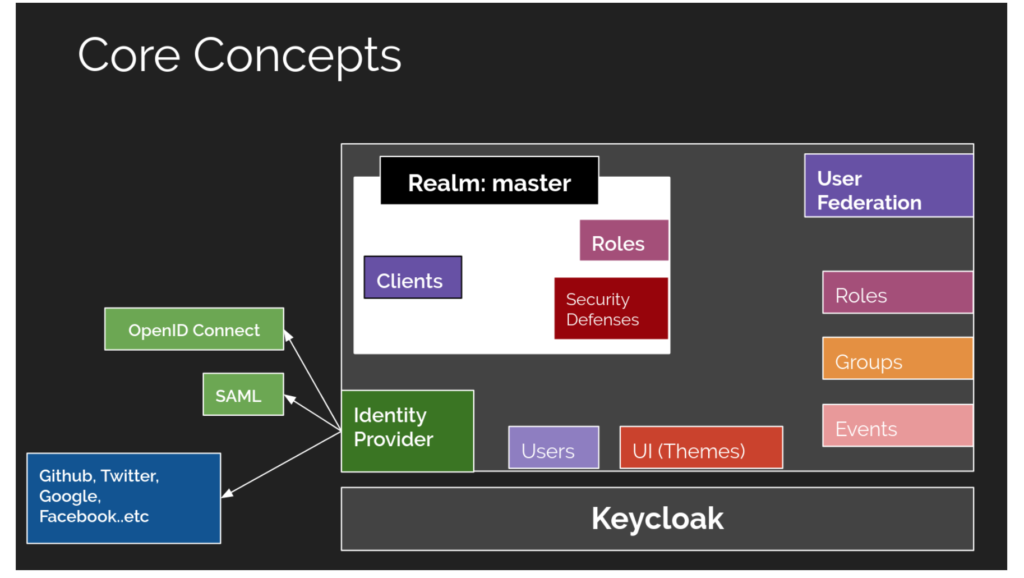
The most important elements of Keycloak are Realms. Realm manages a set of users, roles, and groups. Each user belongs to a Realm and logs into it. A Keycloak instance can have multiple Realms – each one is isolated.
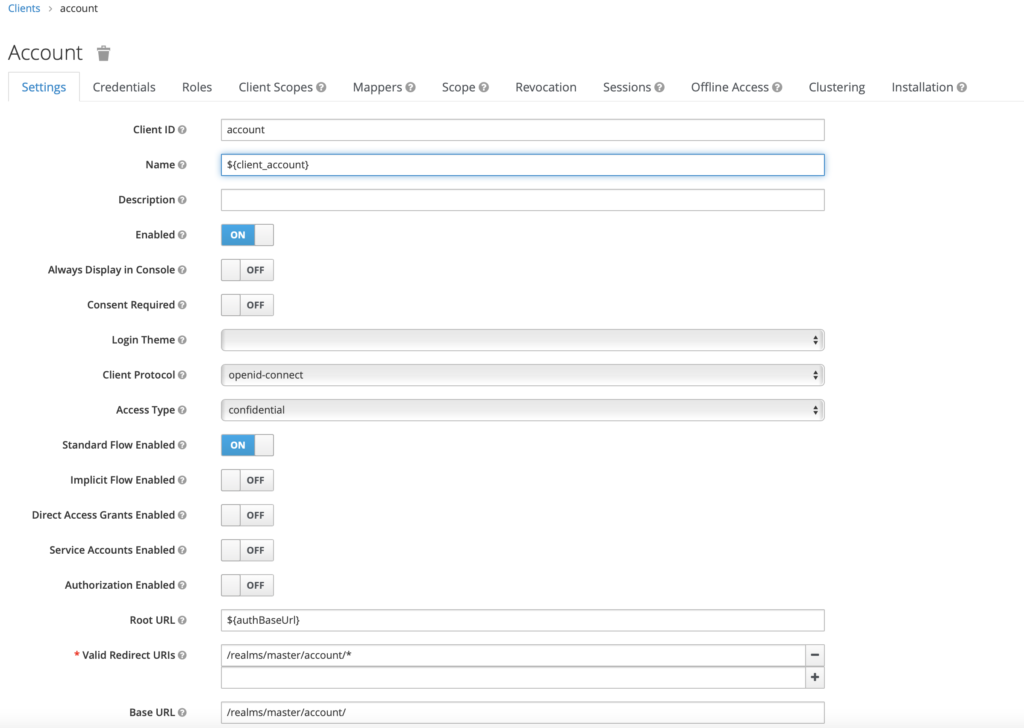
Under each Realm, we can create Clients. Clients usually represent applications and services that use authentication through Keycloak.
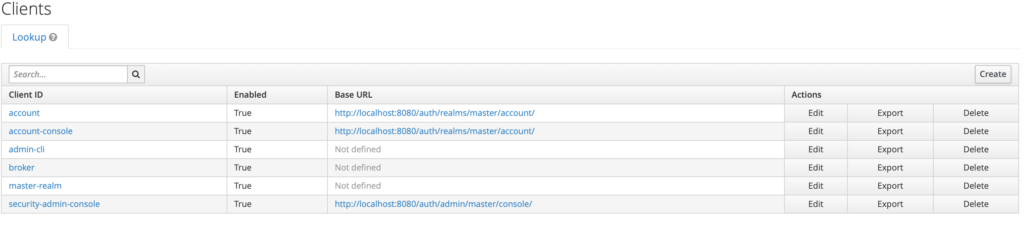
From the Client’s level, we can set such properties as – Access protocol, Access type, and even disable the Client.
Another important element of Keycloak is – roles. Let’s imagine an application where we have regular users and administrators. It is in this tab that we create our roles. And then we assign users to them.

If we want our application to log in through a Google account, we need to go to the Identity Provider tab. This is where we can configure our identity provider.
In today’s post, that’s it. The next entry will start with the issues related to users. What will be the next step? We will integrate Keycloak with the application backend written in Spring Boot.